Showing posts with label thrifting. Show all posts

Sunday, May 18, 2014

And Then There Was An A-line Skirt


Once upon a time a sheet was hanging at a thrift store. That sheet did not know what it's purpose was any longer since it's partner was no longer around. In came a bright determined sewer who looked at that sheet and saw a skirt. Took a few dollars to to buy the sheet. She then brought it home and cared for its needs with a good hot washing and drying. Gently fold that sheet and placed it promptly in the sewing corner of the kitchen.
For weeks the dressmaker tried to figure out what to do with the sheet. Drawing pictures and looking through patterns to find just the perfect garment or two.
One cold and dreary spring.... Are we sure it was not still winter? No, spring weekend the sewist dreaming to become a designer decided to watch the Patternmaking Basics: The Shirt Slopper offered on Craftsy.  New inspiration began fluttering and and singing in her brain. Although this would be designer had a perfectly good skirt block made from her Surefit Designs Dress Kit she thought it would be great fun to see how she could change that pencil skirt (straight) into some thing new.
When it came time to work with the fabric she released she could not separate the sheet from her new friend, some pink broadcloth, and decide the broadcloth would be the perfect lining.  Other decisions went into the plan and inspiration began dancing in her head. The skirt no longer would be a straight skirt but and a-line for summer with in seam pockets.  So at last the day came and the button was sewn on. The happy seamstress looked at the creation and said yes this is good. Smiling as the sheet now skirt fluttered in the wind with all it's glory.

The magic of dart manipulation and adding volume. I've been reading about it in several books including  Patternmaking of Fashion Designers, and Make Your Own Dress Pattern. It was just the right time to take a new step. One of the things I have learned is that having several well fitting basic patterns is all you need to start designing more for yourself. A rather good wardrobe can be at your finger tips.  I will be sewing this skirt again. After a few more minor adjustments  I commit it to card stock like my initial pencil skirt I made earlier this year. I'm not sure what's up next on my sewing table but several Lutterloh tops have been calling. Happy sewing!


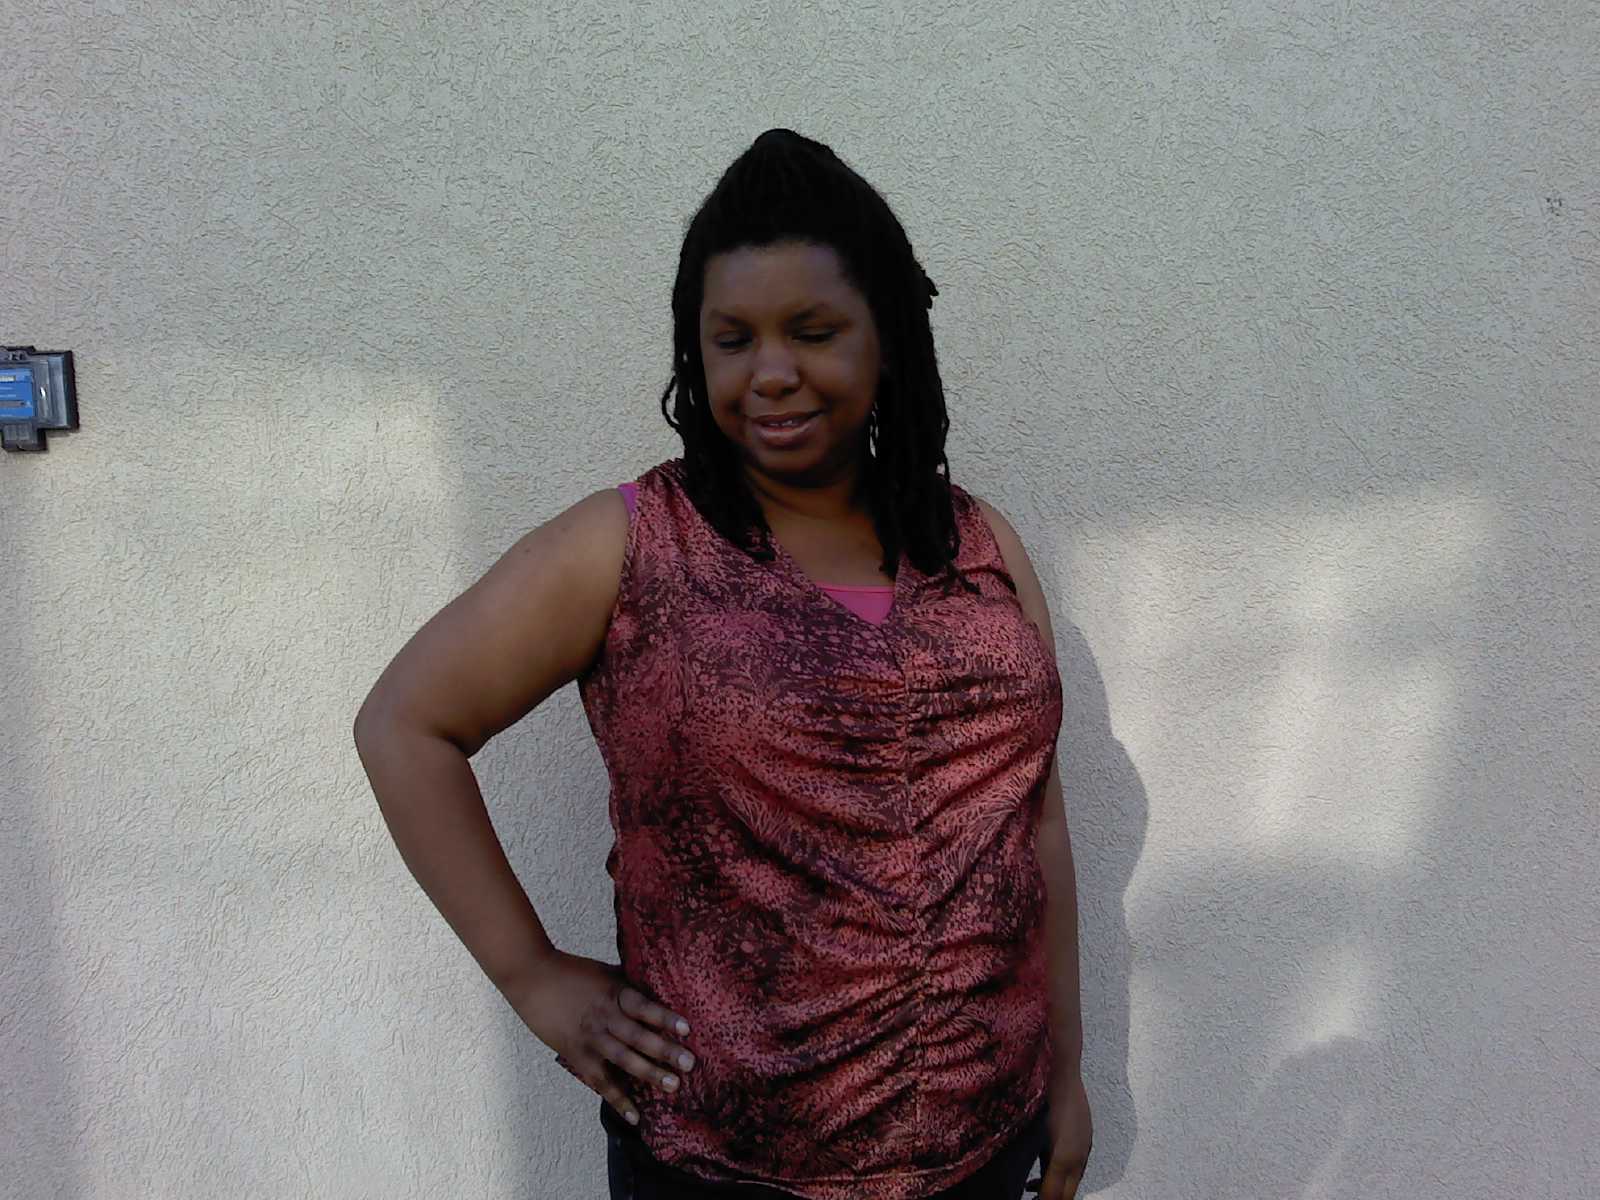
Update: My daughter tried on my skirt and it fit her perfectly. I decided to give it to her as one of her Mary Kay outfits. Here she is styling it.


Sunday, March 9, 2014

The Makings of a Great Skirt Sew Off

The weather this winter has been horrible. Snow, cold, snow, cold etc. Enough already!I really should not complain the cold had me looking for spring/summer skirts which lead me to Lutterloh 267-159-2007. This skirt had my mind moving and my yearn to play with fabric going. Never dreamed it would become a  huge disappointment for me. Three tries later we got to the point of one I might wear this summer but the verdict is still out on that with ten inches of snow still on the ground. On to the review.

Pattern: 
Lutterloh 267-159-2007 (supplement-pattern-year) 
Pattern Description: 
This is a mermaid skirt that would be used in conjunction with a sari or other ethnic type garment. Sorry don't have a better explanation.
Pattern Sizing:
Lutterloh is based on your bust and hip measurement. Your pattern is drafted out using these two measurements. So ideally if your bust and hip are 50cm to 140cm the system should work for you. 
Did it look like the photo/drawing on the pattern envelope once you were done sewing with it?.
Yes but in one fabric.
Were the instructions easy to follow?
Lutterloh has no instructions. I checked a few of my resources about fit.
What did you particularly like or dislike about the pattern?
I like the general shape of the pattern. What I disliked once it was made was that it had no darts or other helps to fit it properly.
Fabric Used:
This was a piece of poly mix of some sort I picked up in Jo Ann fabrics clearance section.
Pattern alterations or any design changes you made:
I drafted this pattern out a total of 2 times with 3 alliterations. The first was in a 122cm hip to try to create it as a wrap skirt. I ended up having to cut over 2 inches from the hem. the skirt was so large I had to remove my over lap and still take it in over 2 inches on each side seam. after much putzing with it I decide a need to re-draw the pattern. Second draft was done in a 120 hip. the ease was still huge 6cm in the waist and 4cm in the hip according to the patter paper. Once I sewed it up it still was about 6 inches to big in the waist so I took in each seam by about 1 inch. By this time I was very tired of playing with pattern and put the wearable muslin in my closet not taking it back out until today. 
Would you sew it again? Would you recommend it to others?
Yes to both questions. I’m determined to get the fit correct on this one. I have some wonderful bright summer tropical fabric waiting to be made into this skirt.
Conclusion: 
This one might end up in the waste basket.


When it comes to sewing the best 2 cents I can give is try something new. So I did. For the first time in a long time I drafted a pattern from scratch to use to compare to my other patterns and then I decided to to give my SureFit designs a try. My endeavor is to eventually remake the above skirt from scratch. In the mean time why not have a little fun making some new skirts and playing with different styles. This leads us to my first SureFit pencil skirt that I made with the aid of the dress kit  and the pencil skirt design sheet. There is nothing like learning a new system, but after making a quick skirt sloper this pencil skirt went together like a dream.

Pattern: 
This pattern was drafted using the SureFit Designs dress kit and downloadable pencil skirt fashion leaflet.
Pattern Description: 
Pencil skirt with back slight, darted waist, waist band and back zipper.
Pattern Sizing:
I used my measurements to create the pattern. With SureFit’s dress kit it teaches you how to use your body measurements to get a good fit to start out with.
Did it look like the photo/drawing on the pattern envelope once you were done sewing with it?.
Yes
Were the instructions easy to follow?
Yes the instruction used to draft the skirt were easy to follow. I checked a few of my resources about fit only to make sure I was not seeing anything that I need to fix.
What did you particularly like or dislike about the pattern?
I wanted a blank canvas to work with to create other skirts. This simple pencil skirt will work great as a starting point. The waist may have been taken in to far but that maybe a measurement mistake on my part.
Fabric Used:
A denim remnant found at my local Goodwill.
Pattern alterations or any design changes you made:
I first drafted out my skirt sloper to address any fit issues. I found on my slipper that my waist and hips were too big so I had my daughter remeasure me. I then drafted a new copy of the sloper. Next I adjusted the this pattern to be a pencil skirt according to the fashion leaflet. trying on the pencil skirt mid way through construction I thought I saw some pooling in the back under my bum but after having my son take the pictures I don't seem to see it any more.
Would you sew it again? Would you recommend it to others?
Yes to both questions. This may become a TNT skirt to use to create other skirts and designs from.
Conclusion: 

This is a good wardrobe builder.

Let the skirt sew off continue. 
If you are wondering what books I might consult when sewing and fitting something new it would be Easy Guide to Sewing, Fit For Real People, Fitting and Pattern Alterations, and A Guide to Fashion Sewing.

Wednesday, March 5, 2014

Nothing Wrong With a Little Curve

With my newest sewing adventure I was playing with the idea of curves. I read that woman with an O or rectangle shape meed to find the way to give the illusion of a shape. Nothing sleeks of feminine curves like the appearance of hips and a small waist. On a plus sizes body the illusion of being fit may be hard but seams going in the correct place may help. This wonderful Lutterloh pattern seemed to be made to help with both of these goals. This six paneled side zipped tulip skirt is one hot number for work or play. I made mine up in denim for a comfy weekend look.


Pattern: 
Lutterloh 274-139-2009 (supplement-pattern-year) 
Pattern Description: 
This is a basic 6 panel skirt with tulip hem.
Pattern Sizing:
Lutterloh is based on your bust and hip measurement. Your pattern is drafted out using these two measurements. So ideally if your bust and hip are 50cm to 140cm the system should work for you. 
Did it look like the photo/drawing on the pattern envelope once you were done sewing with it?.
Yes
Were the instructions easy to follow?
Lutterloh has no instructions. Using A Guide to Fashion Sewing by Connie Amaden-Crawford I was able to create very nice flat-felt seams making my inside look nearly as nice as the out side. Two side seams were ironed flat and serge finished so I was able to put in a side zipper.
What did you particularly like or dislike about the pattern?
I liked that this pattern because the silhouette gives a wonderful curvy illusion that is very feminine. 
Fabric Used:
Dark denim with a slight stretch that was in my stash. This fabric was a goodwill find.
Pattern alterations or any design changes you made:
The size I traced this out in gave me a waist that was 14 cm smaller than what I needed. I wanted the skirt to fit me snug so I added 1 cm to each seam at the waist and blended back into the hip. This should have fit me snug as that is still 2 cm smaller than I need but it some how was a bit big. Thankfully I do not feel the need to pull it up every 5 minutes like have with some store bought ones lately.
Would you sew it again? Would you recommend it to others?
Yes to both questions. I have a friend that has asked me to create this skirt for her.
Conclusion: 

This is a nice basic skirt making it a great choices to build the basics in my wardrobe.

Sunday, July 31, 2011

One Pattern Many Looks Entries

m

It all started in June when I made my Lutterloh skirt . I fell instantly in love with it and knew I wanted to make more. This realization seem to come at the perfect time because PR had just started the newest contest and wouldn't you know it was there One Pattern Many Looks Contest. I wanted to enter. No, I had to enter but first things first I needed to reproduce the skirt more than once and some how make it different each time. Five ideas quickly came to mind and the were wonderful because each one would use some stash fabric.I'm excited to share with you 4 of the five ideas that came to life. A review on how Lutterloh Supplement 281 #145 has become a big part of my summer.

First up, a girl need some thing to play in on those hot days of summer. Why not a white denim skirt.?The fabric of this skirt came from Fabric.com and has been sitting in my stash for a year. I want this skirt to have a little personality but all the look of a pair of white denim pants. All the top stitching on this skirt have been done in black. The pockets I did the same way as I would on a pair of jeans.


Skirt number two was all about a casual shopping trip. We all know how we want to wear something comfortable yet fashionable when we go shopping. Especially clothes shopping. Why not a knit skirt. This skirt was made from some great double knit from the stash. I believe the fabric originally came from fabric.com. This fabric has a lovely cotton feel to it so I believe it may be a cotton/poly blend. I have never been able to find another double knit that feels like this. To spice up this version Fuchsia piping and top stitching was added. Can't forget the great Prada purse thrifted last summer.

 "Girls just want to have fun oh, girls just want to have fun." Thank you Cyndi Lauper for invading the air waves well I grew up. This theme song of the '80's seemed to be constantly on. Unfortunately girls cant always have fun some times it down to business we need to go. That's were skirt number three will come in handy. It is made of a charcoal gray poly suiting I picked up last year during one of fabric.com wonderful sales. This winter paired with some black tights and a cardigan or jacket it will be perfect for the class room.

Last but not least is skirt number four. We all know there are those times when the candles are lit and the lights are dim. Our honey only has eyes for us. They're smiling eyes, happy to enjoy a little Friday night date night time. why not wear designer? This skirt is made out of a great piece of designer Woven Jacquard purchased during fabric.com designer sale fall of 2009. The piece I bought was too tiny to do much with it but this skirt fit it perfectly.

Oh by the way all my 4 tops are from the same pattern too. It is Lutterloh 277 #101 the review of the pattern can be found here and here.  With a new school year approaching my household is about to see a few changes which includes me returning to college. Excited about it but also excited to switch over to fall sewing. Really needs some new dress pants. Happy sewing until next time.

Sunday, July 3, 2011

Me Made June the Final Days

The challenge is finally done. What I learned from Me made June  is that I have a few garments that I grab over and over and over again and that I also have some holes in my wardrobe. The goal is to slowly build my wardrobe up so that 90% of the clothes I have are me made. Also creating mini wardrobes of 6 or more pieces in the same color story seems to work well when putting outfits together.  On to the outfits.

Day 20 Sweater: Thrifted, Top: Lutterloh Special Edition 31 #6, Pants: Macy's Jeans.
Day 21 Top: Lutterloh Supplement 279 #203, Pants: Lutterloh Project Jeans, Fuller Figure #137 copyright 1996.
Day 22 Hoddie: Macy's, Top: McCalls 5977, Pants: Macy's Jeans.
Day 23 Sweater: Kohls, Top: BurdaStyle Magazine 02-2009-118, The cutie on my arm is my great nephew.
Day 24 Some days you just feel like lounging. Today's lounge wear is vintage Lutterloh from the 1970 book  #416 copyright 1969.
Day 25 Sweater: Thrifted, Top: Top: Lutterloh Special Edition 31 #6, Pants: Simplicity 5074.
Day 26 Top: Lutterloh Special Edition 31 #6, Skirt: Lutterloh Supplement 281 #143.
Day 27 Top: Lutterloh Supplement 271 #45, Cami: Lane Bryant
Day 28 Gray Top: Thrifted, Green Top Butterick 5100
Day 29 Top: Lane Bryant, Pants: Lutterloh Project Jeans, Fuller Figure #137 copyright 1996. Correction the Pants are actually BurdaStyle 04-2009-134.

Day 30 Hoodie: Macy's, Top: Lutterloh Special Edition 31 #6, Skirt: Burda Plus Fashion Spring/Summer 2008 (E985) 405.

I'm currently working on what my kids have named the wonder bread top.  Happy sewing until next time.

Tuesday, June 21, 2011

A Few New Pieces.

So what do you do when summer cant decide to come? It"s mid June and it seems like mother nature is going through PMS or something. One day it's 90F and hot Hot HOT and the next day it's a rainy 60F and everyone is pulling out long pants and hoodies. 


For me that has put a hold on real summer sewing and instead I've been focusing on pieces that can be layered for easy of wear year around. Two of my Lutterloh patterns have become favorites. The first is Lutterloh Special Edition 31 #6. I've made this sleeveless darted pattern 3 times, and one of those times was as a dress. It still needs a little armhole work before I will totally call it a TNT but it's close. The second piece is Lutterloh 281 #145. This skirt I did in a fun denim.


 Pattern: 
Lutterloh Special Edition 31 # 6
Pattern Description:
This is a Fuller Figure pattern for a darted sleeveless knit top. A great alternative to summer tank tops or dress it up to replace a cami.
Pattern Sizing:
Lutterloh is based on your bust and hip measurement. Your pattern is drafted out using these two measurements. So ideally if your bust and hip are 50cm to 140cm the system should work for you. 
Did it look like the photo/drawing on the pattern envelope once you were done sewing with it?
I’ve made this 3 times. Both tops look like the line drawing. My dress version looks a little different.
Were the instructions easy to follow?
Lutterloh has no instructions. If you have basic sewing knowledge and have put a simple knit top together you should be fine.
What did you particularly like or dislike about the pattern?
I love that this top is simple yet the look of it changes depending on what type of fabric you use. It can be worn as a layering pieces but has enough shape to be warn alone.
What I didn’t like was that the arm holes are not snug enough. On my white version I did not stay stitch the neck and arm openings before binding and they stretched horrible.
Fabric Used:
For the multi color top a cotton blend knit from Fabric.com
For the white top cotton blend single knit from Hancock.
For  the strip dress a poly/rayon I believe came from Hancock.
Pattern alterations or any design changes you made:
On all three tops I experimented with making a binding per Easy Guide to Sewing instead of the facing piece Lutterloh suggests. I was working on a more t-shirt look. Also on all three I did a ½ inch narrow shoulder adjustment.
On the dress I added 19 inches to the length, rounded out the hips slightly and tapered the hem in by a ½ inch.
Would you sew it again? Would you recommend it to others?
Yes I will be sewing this again. Yes I would recommend this to other.
Conclusion:
This would be a great basic to add to any wardrobe. It can be dressed up or down depending on the fabric used.
Pattern: 
Lutterloh Supplement 281 # 144 or 145
Pattern Description: 
Easy fit a-line pull on skirt with two lengths and front pockets.
Pattern Sizing:
Lutterloh is based on your bust and hip measurement. Your pattern is drafted out using these two measurements. So ideally if your bust and hip are 50cm to 140cm the system should work for you. 
Did it look like the photo/drawing on the pattern envelope once you were done sewing with it?
Yes
Were the instructions easy to follow?
Lutterloh has no instructions.
What did you particularly like or dislike about the pattern?
This is a basic skirt. It could be a wardrobe styple depending on what fabric you made it in or how you dressed it up. It gave me a chance to practice top stitching and creating clean finished pocket bags using the French seam technique I learned from the Lutterloh New Zealand Jean Design class.
At the moment maybe the pockets. I believe they are cut a little too deep. I used some jean making techniques to create them so the bags would be made from a cotton lining. I found when I finished the skirt I had to do a little tacking on outer edges of pocket to have functioning pockets with out the lining peaking through.
Fabric Used:
Light weight black denim with slight stretch rescued from Goodwill. The pocket bags are made from a butterfly quilters cotton given to me from my mom’s friend.
Pattern alterations or any design changes you made:
Slightly tacked the corners of the pockets by sewing on top stitch line about ½ inch at top and side of pockets. I also used jean technique of using lining fabric for pocket bags and clean finishing them with French seams.
Would you sew it again? Would you recommend it to others?
Yes I will be making this again. Yes it is a good basic skirt.
Conclusion: 
This a great basic skirt that can be dressed up or down. Wonderful way to ad diversity to your summer wardrobe. For me I’ll be using it in place of always wearing crop pants.

Saturday, June 11, 2011

Day 11 and the Jean Adventure.

And after 3 weeks the jean making adventure has come to and end with the production on my wearable muslin. I will be making more pairs in the future but for know a few short gratification products are in store.

This adventure start back here when I announced I would be to take the Jeans Design Project offered by Lutterloh New Zealand. It's a wonderful class and I would recommended it to anyone. Sonja directions and helpful hints made it very enjoyable to try throwing around five pounds of denim on my sewing table as it was being molded into a pair of jeans.

After cutting out my denim and creating the front pockets it felt like half of the work was done. what a good feeling. The front stay and the zipper made the front look put together.

The yoke on the back of this denim is cut deep. It som how works very nice with the deeper crotch found in the Lutterloh fuller figured patterns.

once the yoke was created we sewed the inner leg seam. and the crotch. The order worked but make it ard when it was time to do the double top stitching on the outer leg. If you have any ideas to make this easier let me know. My double needle did not like the denim this thick and I ended up using my edger foot to do all my top stitching.
Once I basted the side seams I fit them on me again and again.  and again. until I felt that the looked ok. On problem I had was no matter how often I took in my waist band it seemed to keep growing. Also under the bottom I keep getting the line of fabric. Wondering if a flat but alteration would fix that.


After all this fitting was done it was a lot of fun deciding where oh where to place he back pockets and add all the finishing touches one it was all sewn up.

Over all I am happy with the final result and consider them a good working muslin.
Day 11 Lutterloh Jean Project jeans and Lutterloh Supplement 279 #203
 Pattern: 
The Pattern is the master provided by Lutterloh New Zealand’s Jeans Designing Project or Class. It is the full figured pattern #137 with a copyright of 1996

Pattern Description: 
This is a simple 5 pocket denim jean pattern made with a relaxed leg.

Pattern Sizing:
Lutterloh is based on your bust and hip measurement. Your pattern is drafted out using these two measurements. So ideally if your bust and hip are 50cm to 140cm the system should work for you. A side not the Fuller Figure provides extra depth in the crotch.   
         
Did it look like the photo/drawing on the pattern envelope once you were done sewing with it?
Yes but mine were longer and had a few changes.

Were the instructions easy to follow?
Lutterloh has no instructions. But Sonja from Lutterloh New Zealand’s direction from the Jean making course are excellent. Only found one area about attaching the waist band that is not clear. Her directions use words as well as diagrams to help you along. Also I used the zipper directions found at Threads.

What did you particularly like or dislike about the pattern?
I like that I could make these pants the way that I wanted too. The crotch depth is nice to don’t feel like I’m getting a wedgy or caring a wad of extra fabric. Mostly the relaxed fit was a pleasant surprise compared to the second skin look that seems a must because of the spandex in the denim.
Dislikes that I made the waist too big and still need to do some minor tweaking on the pattern. The yoke on this pattern also sits kind of low. I don’t really minded it but may try a pair in the future with this adjusted.

Fabric Used:
This was a dark denim that I rescued from Goodwill a few months back. It has a slight stretch to it that I didn't notice until I started this project.

Pattern alterations or any design changes you made:
Adjusted the waist by 4.25 cm. Ended up taking most of that out of it by making 1 inch seems. Pants still could have had a smaller waist. I also had to cut a new waist band almost 10 cm bigger because I think through all the playing with the fabric it grew. Created my waist band to be thin by only cutting out one strip and folding it in half. Made my belt loops thick. Per Sonya directions created a front stay. The front stay would be a great way to create a tummy slimmer. I made my back pockets very plan. Left off the rivets on this pair.

Would you sew it again? Would you recommend it to others?
This was a good pattern. I will be sewing it again and again as I want to fine tune and do some design changes. If you take the class good for beginners otherwise you need some knowledge of sewing this is not a easy project and takes some time.

Conclusion: 
Great little jean pattern that can become a tnt after a little more fine tuning.

Friday, June 10, 2011

Me Made June days 4,5,6,7,8,9,and 10

I'm going to get right down to the knitty gritty. There will not be a whole lot of commentary in this post but it will contain at least one picture for each day. I have spent the last seven days working hard on my Lutterloh jean making adventure through the Jeans designing project, which is a class offered by Lutterloh New Zealand. More on the Jean adventure later.

Day 4
Day 4 was one of our first really nice days. Perfect day to crayfish or just splash in the stream. I wore Simplicity 4632 top in a doted teal, silver and aqua and Burda Plus Fashion spring/summer 2009 411 pants in white denim.
Day 5  was just as warm but everyone wants to look there best on Sunday. Ok every day. So on day 5 I wore black short sleeve sweater thrifted, black and white doted cami from Lane Bryant and skirt Burda Style Magazine 3-2010-136.
Day 5
Day 6
Day 6 Another wonderfully scorching hot day. Were does a girl find some shade? Day 6's outfit Pants are  Khaliah Ali Collection Simplicity 4375 that I made as crops back in July of 2008 and the teal top is a one hour pattern Butterick 5100 that dates at least that far back too.

Woo half way there.

Day 7


Day 7 My kiddos are getting tired snapping my picture everyday. Any one have a good way to bribe them? Just kidding.
On Day 7 it felt like summer was in full swing. Hot hot and more hot. I wore a gray pair of  Burda Plus Fashion spring/summer 2009 411 in gray satin cotton. They are so soft. The aqua top is a Khaliah Ali Collection Simplicity 2948.

Day 8 
Day 8 Still very warm for the first day of summer school. Want the dress comfortable but still professional for the environment. Top is Lane Bryant and pants are a  Khaliah Ali Collection Simplicity 5074.  


Day 9


Day 9 The temperature took a huge dive. How wants to put back on winter or early spring clothes? Not I. Coral Sweater is Lane Bryant and pants are Burda Plus spring/summer issue (E895) 410.

Just one more day this time around.

Day 10

Day 10 is my newest version of Lutterloh supplement 279 # 203. For this version I tried to make a ribbing neckline using the directions in Singer The Complete Photo Guide To Sewing.. I used the self fabric as my ribbing. It did not work quite the way I thought but I still love and ear this top that was made from a thrift store find.

Not sure whats up next on the cutting table. I'm guessing some instant gratification since the Jean project was time consuming. Until next time happy sewing. 

Friday, June 3, 2011

Me Made June day 2 and 3

Day 2 of Me Made June was an exciting one filled with many graduations, and all the busy end of the school year stuff. Wanted to feel cool yet business casual. Out of the closet came a Burda Plus Fashion sleeveless top plus a short sleeve knit jacket I picked up thrifting. This top I finished in early May and I've worn it quiet a bit since.


 Pattern: 
This is my rendition of Burda Plus Fashion spring/summer 2011 421
Pattern Description: 
Burda Magazine has described this top as simple, figure hugging and sleeveless. TO me it is a dress alternative to your basic tank top.
Pattern Sizing:
Burda sizes 44-46-48-50-52-54
Did it look like the photo/drawing on the pattern envelope once you were done sewing with it?
Yes and no mine end up with little wings at my hipline.
Were the instructions easy to follow?
These are your typical Burda Magazine instructions. They are complete but at some points you wonder were they are going. What I learned was that the are accurate as long as you follow step by step.
What did you particularly like or dislike about the pattern?
Love that this top can be dressed up our down depending on what type of knit you use. It has nice thic straps so no bra peaking out.
Don’t really like how tight the underarms are. It not bad because you have no bra showing but next one I will make just a little looser in the underarm.
Fabric Used:
This was some poly knit I rescued at the Thrift Shoppe
Pattern alterations or any design changes you made:
Using Pattern Fitting with Confidence I did a slide and pivot FBA of 15cm and need to add 26cm to the waist.  This might have been over done since I end up with some wings at my hipline. Over all the top fit well.
Would you sew it again? Would you recommend it to others?
Yes I plan to make this again as it is very comfortable to wear and dress up nicely. Yes I do recommend it to others. Beginners make sure you follow the directions step by step.
Conclusion:
This is a fun and simple alternative to you normal basic summer tank.

Today which is Me Made Day 3 was a busy hot and stick last day of school. Wanted to stay cool standing out in the heat at the end of year carnival.  So out came McCall's 5663. I originally made this now oop pattern back in the summer of 2008. Still love the flowiness of this thin knit top.

Time to get back to my jean design project. Happy sewing.