
Thursday, August 4, 2011
Overwhelmed
Sunday, July 31, 2011
One Pattern Many Looks Entries
m

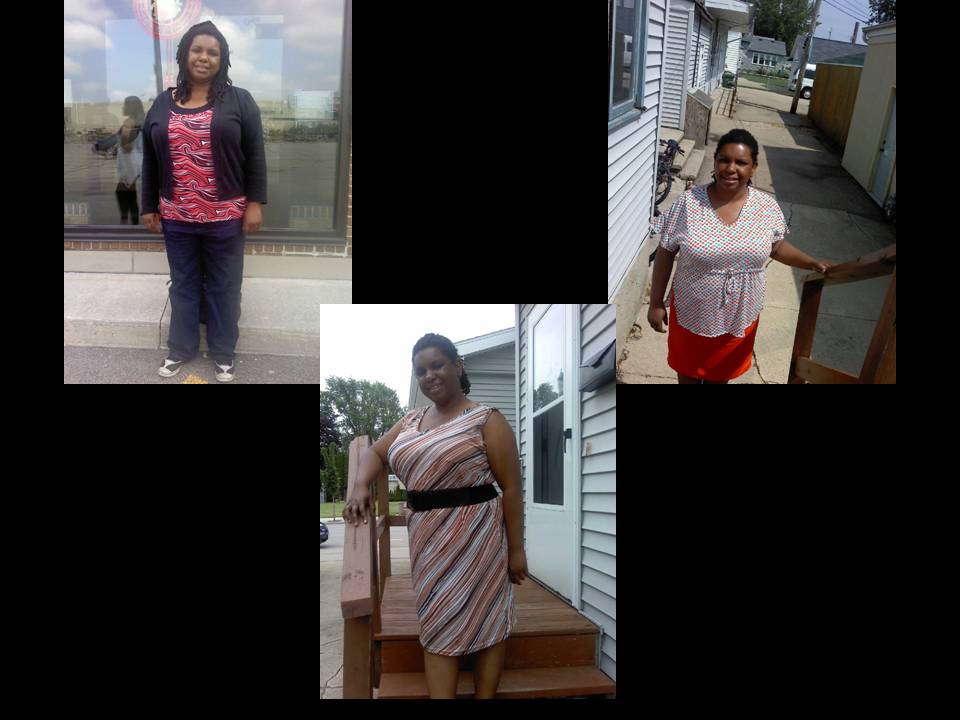
It all started in June when I made my Lutterloh skirt . I fell instantly in love with it and knew I wanted to make more. This realization seem to come at the perfect time because PR had just started the newest contest and wouldn't you know it was there One Pattern Many Looks Contest. I wanted to enter. No, I had to enter but first things first I needed to reproduce the skirt more than once and some how make it different each time. Five ideas quickly came to mind and the were wonderful because each one would use some stash fabric.I'm excited to share with you 4 of the five ideas that came to life. A review on how Lutterloh Supplement 281 #145 has become a big part of my summer.


Oh by the way all my 4 tops are from the same pattern too. It is Lutterloh 277 #101 the review of the pattern can be found here and here. With a new school year approaching my household is about to see a few changes which includes me returning to college. Excited about it but also excited to switch over to fall sewing. Really needs some new dress pants. Happy sewing until next time.
Saturday, July 16, 2011
Redo
 |
| Lutterloh 281 #145 and Lutterloh 277 #101 |
 |
| Lutterloh 281 #145 and Lutterloh 277 #101 |
On PR I was able to get some great suggestions on how to fix my issues. On the Lutterloh board mufffet and Miss Fairchild wonderful suggestions and on the plus size sew along several ladies directed me to these Webcasts. The one on fitting t-shirts/french darts and french curve were helpful. Thank you ladies.
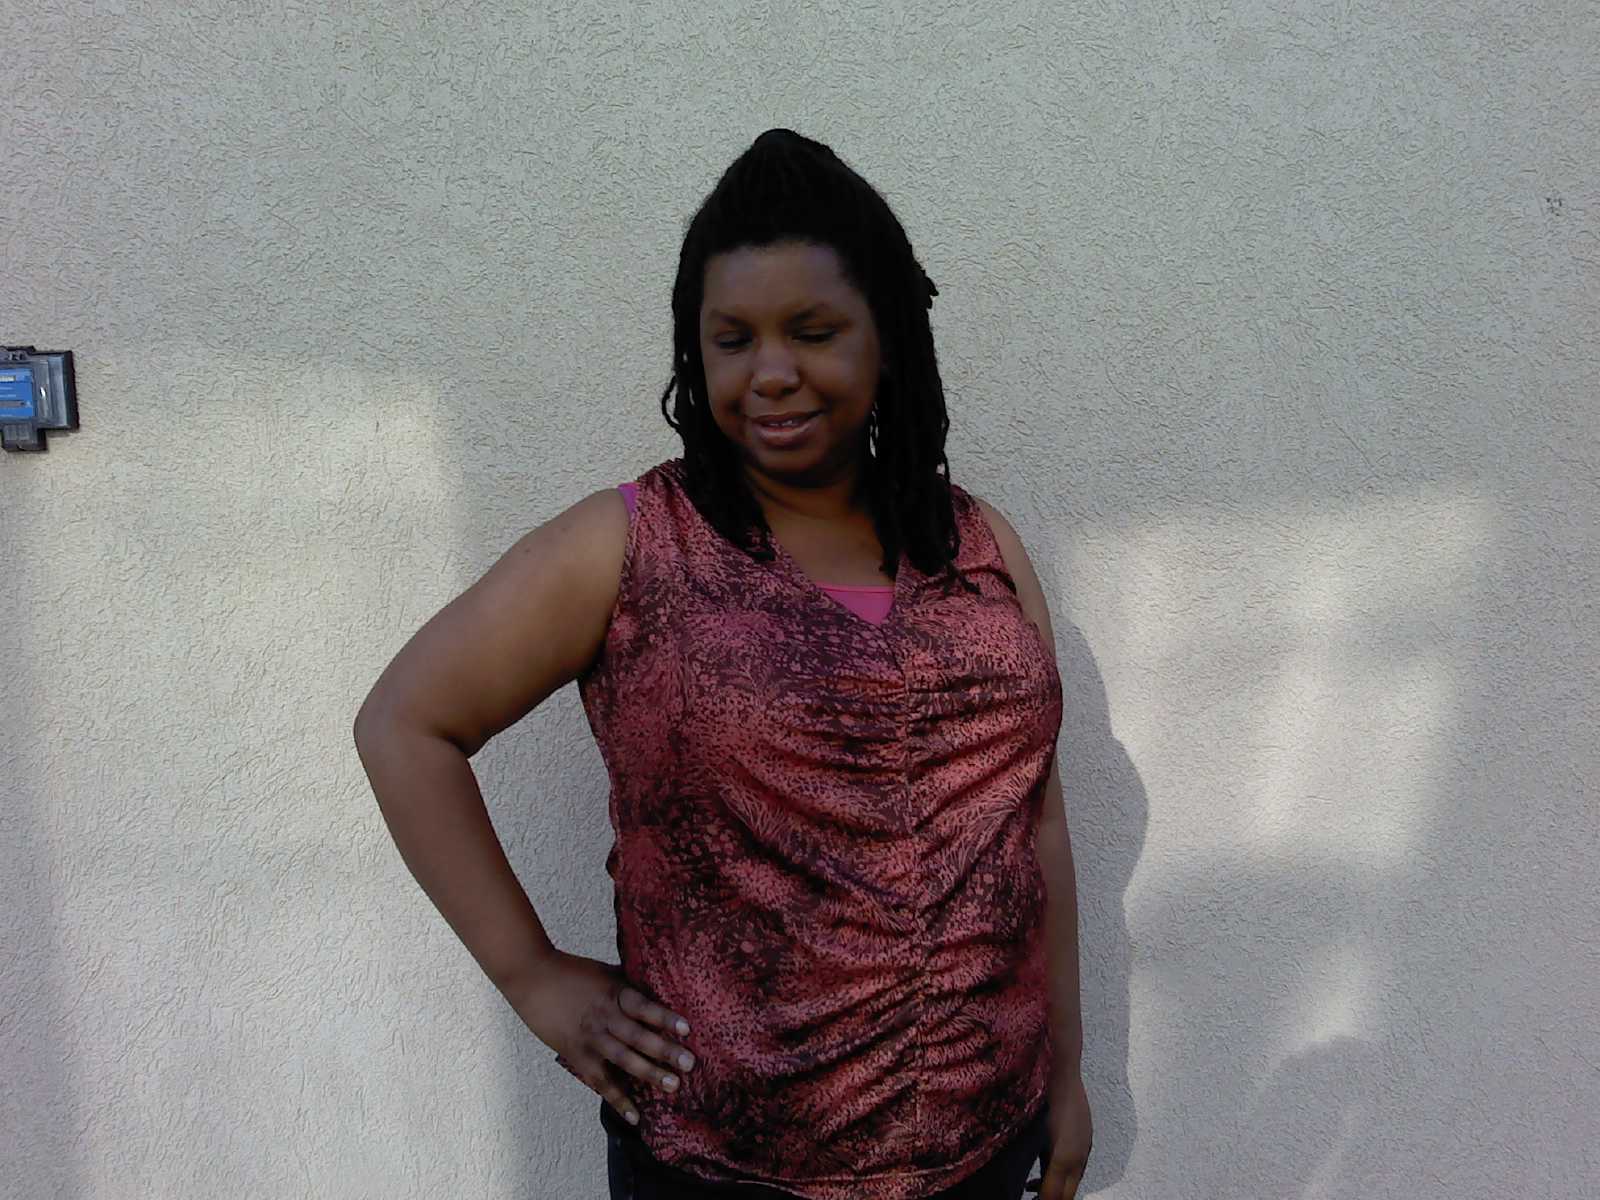
I think my second top which I have named flower power fits much nicer than the first hot pink one. It is made with some poly knit from my stash that I rescued from Goodwill. Here is what I did.
 |
| Bottom one is the new pattern the top is the original |
2. Drew two lines across the pattern one a little above high bust (line a) the second was at about high hip(line b).
3. Then I folded line a up 2 inches and I folded line b up 1 1/2 inches. This shortened the pattern by a total of 5 inches. I did the same to the back pattern.
4. I retraced my front facing piece.
 5. I decided instead of raising the bust dart to change it to a french dart. So I lowered it and using the curve of my lutterloh ruler to help create a french curve.
6. When I sewed the new french dart I cut the extra material gathered in the dart to about 1/4 inch giving a smoother look.
7. The rest of the top was sewn identical to the original.
I am much happier with the second top. What do you think? Happy sewing tell next time.

Tuesday, July 12, 2011
One Pattern Many Looks Challenge and a New Top
 |
| Challenge out fit idea 1 |
I decided that Lutterloh Supplement 281 #144 or 145 would be a great canvas to work with. The skirt is easy and adopts quickly to several fabrics and looks. So the challenge pieces started flowing in my mind. But this blog is not about the skirt it about a new top to go with my challenge piece number one. If you want to know more about the skirt you can here at PR or here at the blog.
 |
| Lutterlolh 281 #145 and Lutterloh 277 #101 |
I love loud bright colors and will wear them year around. I also like clothing that can be layered. This top seem to fit the bill as it can be layered over a tank, cami, turtle neck or t shirt. It can also be the under layer to a cardigan or jacket.
Pattern:
Lutterloh Supplement 277 #101
Pattern Description:
Basic knit tunic length top with v neck, bust darts and cap or short dolman sleeve.
Pattern Sizing:
Lutterloh is based on your bust and hip measurement. Your pattern is drafted out using these two measurements. So ideally if your bust and hip are 50cm to 140cm the system should work for you.
Did it look like the photo/drawing on the pattern envelope once you were done sewing with it?
Yes
Were the instructions easy to follow?
Lutterloh has no instructions.
What did you particularly like or dislike about the pattern?
This top is one of those that can go from season to season depending on what you add over or under it. The sleeves and the v neck are my favorite parts.
The bust dart. The dart is really located in a place that makes it hard to adjust. Also this is tunic length and just a tad long for that.
Fabric Used:
A rayon ribbed knit I found at Hancock Fabrics. Worth it to try this project but this top really grew.
 Pattern alterations or any design changes you made:
The main alteration in this top was trying to move the bust dart so it was really pointing towards the bust instead of the navel. I move my dart up an inch and a half and it still could be moved up more except the bottom of the sleeve is only a ½ away. Not sure how to approach that on the next top.
On this one I used the knit interfacing on the facing pieces. Once attached to the top they were under stitched and then top stitched down about a inch off the edge giving it a nice detail. I also used lace hem binding to stabilize the shoulder seam.
Next top I will also being shorting it by at least 5 inches. If I wore this one un-tucked you would only see about 2 or 3 inches of the bottom of my skirt. Way too long on me. I will also be adjusting the sleeve under arm about 2 or 3 inches to move that bust dart up another inch.
Would you sew it again? Would you recommend it to others?
Once I figure out how to deal with the darts I will be making it again. And yes I do recommend it for others it is a very versatile top.
Conclusion:
This is a great little tunic top that can stretch the season and add a little bit of interest to your wardrobe.
Tuesday, July 5, 2011
The Wonder Bread Shirt
My Children have named this the Wonder Bread Shirt. If truth be told I knew something was familiar about that print. This shirt is whimsical why not wear it with an orange skirt. All joking aside I finished this up and some panties with my long 4th of July Holiday weekend.The top is not my favorite but it will see it wear on these long hot days of summer mother nature has finally decided to bless us with. Today I wore the top in our heat and felt fairly cool and comfortable.
 |
Top: Lutterloh Supplement 280 #29 and Skirt BurdaStyle 3-2010-136 |
Pattern:
Lutterloh Supplement 280 #29
Pattern Description:
Scoop neck knit top with band of different color a neck, sleeve and hem.
Pattern Sizing:
Lutterloh is based on your bust and hip measurement. Your pattern is drafted out using these two measurements. So ideally if your bust and hip are 50cm to 140cm the system should work for you.
Did it look like the photo/drawing on the pattern envelope once you were done sewing with it?
Yes kind of
Were the instructions easy to follow?
Lutterloh has no instructions.
What did you particularly like or dislike about the pattern?
Likes: My children have named this the wonder bread shirt. The slightly puffy sleeve was a nice surprise.
Dislikes: This shirt is very loose fitting which is not apparent in the picture. Also I would have to say the neckline is more boat shaped since it is very open. This causing me to wonder if the shoulders were drafted different in this one.
Fabric Used:
A whimsical dotted knit from JoAnn Fabrics and Crafts bought a year ago.
Pattern alterations or any design changes you made:
½ inch narrow should adjustment. But it was not enough. The neck is very open on this one almost a boat neck. Think it may have been drafted for someone with broader shoulders because on me it became a drop sleeve garment. To give you an idea, the neck band seam is where my shoulder ends. Also I left off the band at hem because the top was already quiet long.
Would you sew it again? Would you recommend it to others?
Not so sure I will sew this again. I would have to do several alterations to make this work the way I want it. It might be the perfect top for someone else. The pieces fit well together and it sewed up nicely.
Conclusion:
Although I am slightly disappointed with my wonderfully whimsical wonder bread shirt I have to admit the loose fit has worked nicely on these hot days of summer.
Sunday, July 3, 2011
Me Made June the Final Days

Day 20 Sweater: Thrifted, Top: Lutterloh Special Edition 31 #6, Pants: Macy's Jeans.
Day 21 Top: Lutterloh Supplement 279 #203, Pants: Lutterloh Project Jeans, Fuller Figure #137 copyright 1996.
Day 22 Hoddie: Macy's, Top: McCalls 5977, Pants: Macy's Jeans.
Day 23 Sweater: Kohls, Top: BurdaStyle Magazine 02-2009-118, The cutie on my arm is my great nephew.
Day 24 Some days you just feel like lounging. Today's lounge wear is vintage Lutterloh from the 1970 book #416 copyright 1969.

Day 26 Top: Lutterloh Special Edition 31 #6, Skirt: Lutterloh Supplement 281 #143.
Day 27 Top: Lutterloh Supplement 271 #45, Cami: Lane Bryant
Day 28 Gray Top: Thrifted, Green Top Butterick 5100
Day 29 Top: Lane Bryant, Pants: Lutterloh Project Jeans, Fuller Figure #137 copyright 1996. Correction the Pants are actually BurdaStyle 04-2009-134.

I'm currently working on what my kids have named the wonder bread top. Happy sewing until next time.
Tuesday, June 21, 2011
A Few New Pieces.

 For me that has put a hold on real summer sewing and instead I've been focusing on pieces that can be layered for easy of wear year around. Two of my Lutterloh patterns have become favorites. The first is Lutterloh Special Edition 31 #6. I've made this sleeveless darted pattern 3 times, and one of those times was as a dress. It still needs a little armhole work before I will totally call it a TNT but it's close. The second piece is Lutterloh 281 #145. This skirt I did in a fun denim.
 Pattern:
Lutterloh Special Edition 31 # 6
Pattern Description:
This is a Fuller Figure pattern for a darted sleeveless knit top. A great alternative to summer tank tops or dress it up to replace a cami.
Pattern Sizing:
Lutterloh is based on your bust and hip measurement. Your pattern is drafted out using these two measurements. So ideally if your bust and hip are 50cm to 140cm the system should work for you.
Did it look like the photo/drawing on the pattern envelope once you were done sewing with it?
I’ve made this 3 times. Both tops look like the line drawing. My dress version looks a little different.
Were the instructions easy to follow?
Lutterloh has no instructions. If you have basic sewing knowledge and have put a simple knit top together you should be fine.
 What did you particularly like or dislike about the pattern?
I love that this top is simple yet the look of it changes depending on what type of fabric you use. It can be worn as a layering pieces but has enough shape to be warn alone.
What I didn’t like was that the arm holes are not snug enough. On my white version I did not stay stitch the neck and arm openings before binding and they stretched horrible.
Fabric Used:
For the multi color top a cotton blend knit from Fabric.com
For the white top cotton blend single knit from Hancock.
For the strip dress a poly/rayon I believe came from Hancock.
 Pattern alterations or any design changes you made:
On all three tops I experimented with making a binding per Easy Guide to Sewing instead of the facing piece Lutterloh suggests. I was working on a more t-shirt look. Also on all three I did a ½ inch narrow shoulder adjustment.
On the dress I added 19 inches to the length, rounded out the hips slightly and tapered the hem in by a ½ inch.
Would you sew it again? Would you recommend it to others?
Yes I will be sewing this again. Yes I would recommend this to other.
Conclusion:
This would be a great basic to add to any wardrobe. It can be dressed up or down depending on the fabric used.

Pattern:
Lutterloh Supplement 281 # 144 or 145
Pattern Description:
Easy fit a-line pull on skirt with two lengths and front pockets.
Pattern Sizing:
Lutterloh is based on your bust and hip measurement. Your pattern is drafted out using these two measurements. So ideally if your bust and hip are 50cm to 140cm the system should work for you.
Did it look like the photo/drawing on the pattern envelope once you were done sewing with it?
Yes
Were the instructions easy to follow?
Lutterloh has no instructions.
What did you particularly like or dislike about the pattern?
This is a basic skirt. It could be a wardrobe styple depending on what fabric you made it in or how you dressed it up. It gave me a chance to practice top stitching and creating clean finished pocket bags using the French seam technique I learned from the Lutterloh New Zealand Jean Design class.
At the moment maybe the pockets. I believe they are cut a little too deep. I used some jean making techniques to create them so the bags would be made from a cotton lining. I found when I finished the skirt I had to do a little tacking on outer edges of pocket to have functioning pockets with out the lining peaking through.
Fabric Used:
Light weight black denim with slight stretch rescued from Goodwill. The pocket bags are made from a butterfly quilters cotton given to me from my mom’s friend.
 Pattern alterations or any design changes you made:
Slightly tacked the corners of the pockets by sewing on top stitch line about ½ inch at top and side of pockets. I also used jean technique of using lining fabric for pocket bags and clean finishing them with French seams.
Would you sew it again? Would you recommend it to others?
Yes I will be making this again. Yes it is a good basic skirt.
Conclusion:
This a great basic skirt that can be dressed up or down. Wonderful way to ad diversity to your summer wardrobe. For me I’ll be using it in place of always wearing crop pants.
Sunday, June 19, 2011
Me Made June day 12 to 19

Day 12 Top: Lane Bryant, Pants: Lutterloh 272 #201.
Day 13 Top: BurdaStyle Magazine 7-2008-118, Pants: Lane Bryant dress pants.
Day 14 Top: Lane Bryant, Pants: Burda Plus Fashion 2-2009-410
Day 15 Top: Lane Bryant, Pants: Lutterloh Jean Project Jeans 1996 #137
Day 16 Cami: Lane Bryant, Hoddie: Macy's, Pants: Simplicity 4375 Khaliah Ali
Again starting at upper left going clockwise.
Day 17 Sweater: Willow Bay, Top: Lane Bryant, Pants: Lutterloh Jean Project Jeans 1996 #137
Day 18 Top: Burda Plus Fashion 02-2010-410, Skirt: BurdaStyle Magazine 03-2010-136 made up in orange double knit with no zipper. Instead I put a 11/2 inch wide elastic at waist.
Day 19 Preview of dress made with Lutterloh Classic Collection 3 Special Edition No. 31 #6 top. A review to this is forthcoming.
Until next time Happy Sewing.
Sunday, June 12, 2011
Tank dress or no tank dress?
With all the lovely Dress Challenge dresses popping up all over blog land I thought it would be a great idea to make a tank dress out of some lovely stripe fabric I had sitting in the stash. Tonight I had my son snap some shots well I was fitting the dress and now I can't decide if this dress is scream tank dress or um I'm just a summer top. So please take a look at my pictures and let me know if you like it as a dress with or with out the ribbon waist. Or if you think It would better of as a summer top. It not to late for me to change it. Thank you for your help.


Saturday, June 11, 2011
Day 11 and the Jean Adventure.

 And after 3 weeks the jean making adventure has come to and end with the production on my wearable muslin. I will be making more pairs in the future but for know a few short gratification products are in store.
This adventure start back here when I announced I would be to take the Jeans Design Project offered by Lutterloh New Zealand. It's a wonderful class and I would recommended it to anyone. Sonja directions and helpful hints made it very enjoyable to try throwing around five pounds of denim on my sewing table as it was being molded into a pair of jeans.


The yoke on the back of this denim is cut deep. It som how works very nice with the deeper crotch found in the Lutterloh fuller figured patterns.
once the yoke was created we sewed the inner leg seam. and the crotch. The order worked but make it ard when it was time to do the double top stitching on the outer leg. If you have any ideas to make this easier let me know. My double needle did not like the denim this thick and I ended up using my edger foot to do all my top stitching.

 and again. until I felt that the looked ok. On problem I had was no matter how often I took in my waist band it seemed to keep growing. Also under the bottom I keep getting the line of fabric. Wondering if a flat but alteration would fix that.
After all this fitting was done it was a lot of fun deciding where oh where to place he back pockets and add all the finishing touches one it was all sewn up.
Over all I am happy with the final result and consider them a good working muslin.
 |
| Day 11 Lutterloh Jean Project jeans and Lutterloh Supplement 279 #203 |
Pattern:
The Pattern is the master provided by Lutterloh New Zealand’s Jeans Designing Project or Class. It is the full figured pattern #137 with a copyright of 1996
Pattern Description:
This is a simple 5 pocket denim jean pattern made with a relaxed leg.
Pattern Sizing:
Lutterloh is based on your bust and hip measurement. Your pattern is drafted out using these two measurements. So ideally if your bust and hip are 50cm to 140cm the system should work for you. A side not the Fuller Figure provides extra depth in the crotch.
Did it look like the photo/drawing on the pattern envelope once you were done sewing with it?
Yes but mine were longer and had a few changes.
Were the instructions easy to follow?
Lutterloh has no instructions. But Sonja from Lutterloh New Zealand’s direction from the Jean making course are excellent. Only found one area about attaching the waist band that is not clear. Her directions use words as well as diagrams to help you along. Also I used the zipper directions found at Threads.
What did you particularly like or dislike about the pattern?
I like that I could make these pants the way that I wanted too. The crotch depth is nice to don’t feel like I’m getting a wedgy or caring a wad of extra fabric. Mostly the relaxed fit was a pleasant surprise compared to the second skin look that seems a must because of the spandex in the denim.
Dislikes that I made the waist too big and still need to do some minor tweaking on the pattern. The yoke on this pattern also sits kind of low. I don’t really minded it but may try a pair in the future with this adjusted.
Fabric Used:
This was a dark denim that I rescued from Goodwill a few months back. It has a slight stretch to it that I didn't notice until I started this project.


Pattern alterations or any design changes you made:
Adjusted the waist by 4.25 cm. Ended up taking most of that out of it by making 1 inch seems. Pants still could have had a smaller waist. I also had to cut a new waist band almost 10 cm bigger because I think through all the playing with the fabric it grew. Created my waist band to be thin by only cutting out one strip and folding it in half. Made my belt loops thick. Per Sonya directions created a front stay. The front stay would be a great way to create a tummy slimmer. I made my back pockets very plan. Left off the rivets on this pair.
Would you sew it again? Would you recommend it to others?
This was a good pattern. I will be sewing it again and again as I want to fine tune and do some design changes. If you take the class good for beginners otherwise you need some knowledge of sewing this is not a easy project and takes some time.
Conclusion:
Great little jean pattern that can become a tnt after a little more fine tuning.
Friday, June 10, 2011
Me Made June days 4,5,6,7,8,9,and 10
I'm going to get right down to the knitty gritty. There will not be a whole lot of commentary in this post but it will contain at least one picture for each day. I have spent the last seven days working hard on my Lutterloh jean making adventure through the Jeans designing project, which is a class offered by Lutterloh New Zealand. More on the Jean adventure later.
Day 4 was one of our first really nice days. Perfect day to crayfish or just splash in the stream. I wore Simplicity 4632 top in a doted teal, silver and aqua and Burda Plus Fashion spring/summer 2009 411 pants in white denim.
Day 5 was just as warm but everyone wants to look there best on Sunday. Ok every day. So on day 5 I wore black short sleeve sweater thrifted, black and white doted cami from Lane Bryant and skirt Burda Style Magazine 3-2010-136.
 |
| Day 4 |
Day 5 was just as warm but everyone wants to look there best on Sunday. Ok every day. So on day 5 I wore black short sleeve sweater thrifted, black and white doted cami from Lane Bryant and skirt Burda Style Magazine 3-2010-136.
 |
| Day 5 |
 |
| Day 6 |
Day 6 Another wonderfully scorching hot day. Were does a girl find some shade? Day 6's outfit Pants are Khaliah Ali Collection Simplicity 4375 that I made as crops back in July of 2008 and the teal top is a one hour pattern Butterick 5100 that dates at least that far back too.
Woo half way there.
 |
| Day 7 |
Day 7 My kiddos are getting tired snapping my picture everyday. Any one have a good way to bribe them? Just kidding.
On Day 7 it felt like summer was in full swing. Hot hot and more hot. I wore a gray pair of Burda Plus Fashion spring/summer 2009 411 in gray satin cotton. They are so soft. The aqua top is a Khaliah Ali Collection Simplicity 2948.
 |
| Day 8 |
Day 8 Still very warm for the first day of summer school. Want the dress comfortable but still professional for the environment. Top is Lane Bryant and pants are a Khaliah Ali Collection Simplicity 5074.
 |
| Day 9 |
Day 9 The temperature took a huge dive. How wants to put back on winter or early spring clothes? Not I. Coral Sweater is Lane Bryant and pants are Burda Plus spring/summer issue (E895) 410.
Just one more day this time around.
 |
| Day 10 |
Day 10 is my newest version of Lutterloh supplement 279 # 203. For this version I tried to make a ribbing neckline using the directions in Singer The Complete Photo Guide To Sewing.. I used the self fabric as my ribbing. It did not work quite the way I thought but I still love and ear this top that was made from a thrift store find.
Not sure whats up next on the cutting table. I'm guessing some instant gratification since the Jean project was time consuming. Until next time happy sewing.
Friday, June 3, 2011
Me Made June day 2 and 3

Pattern:
This is my rendition of Burda Plus Fashion spring/summer 2011 421
Pattern Description:
Burda Magazine has described this top as simple, figure hugging and sleeveless. TO me it is a dress alternative to your basic tank top.
Pattern Sizing:
Burda sizes 44-46-48-50-52-54
Did it look like the photo/drawing on the pattern envelope once you were done sewing with it?
Yes and no mine end up with little wings at my hipline.
Were the instructions easy to follow?
These are your typical Burda Magazine instructions. They are complete but at some points you wonder were they are going. What I learned was that the are accurate as long as you follow step by step.
What did you particularly like or dislike about the pattern?
Love that this top can be dressed up our down depending on what type of knit you use. It has nice thic straps so no bra peaking out.
Don’t really like how tight the underarms are. It not bad because you have no bra showing but next one I will make just a little looser in the underarm.
 Fabric Used:
This was some poly knit I rescued at the Thrift Shoppe
Pattern alterations or any design changes you made:
Using Pattern Fitting with Confidence I did a slide and pivot FBA of 15cm and need to add 26cm to the waist. This might have been over done since I end up with some wings at my hipline. Over all the top fit well.
Would you sew it again? Would you recommend it to others?
Yes I plan to make this again as it is very comfortable to wear and dress up nicely. Yes I do recommend it to others. Beginners make sure you follow the directions step by step.
Conclusion:
This is a fun and simple alternative to you normal basic summer tank.

Today which is Me Made Day 3 was a busy hot and stick last day of school. Wanted to stay cool standing out in the heat at the end of year carnival. So out came McCall's 5663. I originally made this now oop pattern back in the summer of 2008. Still love the flowiness of this thin knit top.
Time to get back to my jean design project. Happy sewing.
Wednesday, June 1, 2011
Me Made June Day 1
Welcome to the first day of June. Today was a casual day at work and all I could think was the need for comfort in our unair-conditioned building. So today I wore my Burda crops originally made back in May 2009.

These pants come from the Burda Plus spring/summer issue (E895). I made them out of some lovely denim. You can read more about my rendition of Burda 410 on my pattern review of them. I matched them up with a simple tee that was a project that some of my local high school students have under taken. To learn more about their project and the t-shirt please visit their website.
 Here is a close up of the shirt.

These pants come from the Burda Plus spring/summer issue (E895). I made them out of some lovely denim. You can read more about my rendition of Burda 410 on my pattern review of them. I matched them up with a simple tee that was a project that some of my local high school students have under taken. To learn more about their project and the t-shirt please visit their website.

Tuesday, May 31, 2011
Me Made June Challenge
After much anticipation and thought I have decided to take on Zoe's Me Made June Challenge. The idea of the challenge is to wear more of your own creations for one months. I believe this will help them get into the rotation of of ones wardrobe so I really love these types of challenges. This is my first time I will be going at it. So I'll be trying to keep it simple. I can't promise I will post daily but I will be posting what I wear. Hope you"ll join in the fun.
I, Jen of http://jtscloset-jen.blogspot.com/, sign up as a participant of Me-Made-June '11. I endeavour to wear
at least 3 of my self made garments each week for the duration of June 2011'
I, Jen of http://jtscloset-jen.blogspot.com/, sign up as a participant of Me-Made-June '11. I endeavour to wear
at least 3 of my self made garments each week for the duration of June 2011'
Monday, May 30, 2011
The Jean Class Begins
Hi everyone. Sorry about the lack of posting. In the mean time I've been busy making a few more pairs of Lutterloh lounge pant for the gym and a few more tops. I'll post a review of the projects when there is a bit more time.
 One challenge with Lutterloh is making sure you have your grain lines in the correct place. The information both in this class and the instructions in Sonya's ebook helped with this.
 The pocket construction was not as complicated as one might expect. But let me tell you using the machine needles made for denim really helped. I also purchased a walking foot for the sewing machine and was surprised that it sewed through 5 layers of denim no problem.

Another helpful tip was to use my overcast/edger foot to do my double row of top stitching. It kept the top stitching fairly even. And it was very easy to use my machines needle positions to create the look.

I wanted to give you an update about the denim and my question about the best way to learn. After much though I decided to pass up for the present on the Jeans for Everybody DVD. I think it maybe an excellent product and it will remain on my wish list. Instead I decided to take the New Zealand Lutterloh class Jeans Designing. I am very excited about this class. Sonja's materials for the class are excellent and well written. A master pattern to work from comes with the class materials and Sonja makes herself available for questions 4 times a year during each class running session. I will be taking more classes in the future.
On to the meat and potatoes of this post. I have not got very far on my jeans yet but I thought I would give you a few little glimpses of the pattern, layout and front pocket construction.


Another helpful tip was to use my overcast/edger foot to do my double row of top stitching. It kept the top stitching fairly even. And it was very easy to use my machines needle positions to create the look.

Also following the instructions from the class on making a French seam my front pocket bags look wonderful. I cut the whole pocket from butterfly quilting cotton that my mothers friend gave me for free. Love it. That is all I have to share today. Happy sewing and I will keep this project updated for you.
Subscribe to:
Posts (Atom)